Deploying Kubernetes has gotten easier than ever. Home Automation with Raspberry Pi(s) can now benefit from some of the tools used by large-scale deployments.
There are many. ways to design an IOT network. Deploying home automation with Rasbperry Pi(s) is a relatively new approach, but one which has many advantages.
Why Kubernetes for IOT?
More experienced makers may point out that the ESP32/ESP8266 Arduino boards are well-loved for their small form factor, low power usage, Wifi capabilities… and affordable price point.
There are many advantages to placing a single Raspberry Pi 3B (or better) in each room in the house. The Raspberry Pi already comes with many useful ports, including:
- Ethernet & 4x USB
- Audio output
- Bluetooth
- TV Out & HDMI
- TV In (camera)
- ~2x as many GPIO pins as an ESP
Each of these things would require more hardware when building on ESP, or when using Featherwings. This makes ESP great for small, single-function tasks that run on battery power. But a Raspberry Pi 3B costs just $25 at a local Micro Center (or $40 on Amazon).
This enables many simultaneous features for each room in the cabin, ultimately cheaper than buying individual ESPs:
- Audio: “Sonos-esque” synced audio with Mopidy, Iris, and Snapcast
- TV: CCTV security cameras in each room with Motion Eye
- USB: sensor data from Arduino devices (see below)
- Bluetooth: beacon (determine which devices are in the room)
- HDMI: kiosk screen for home automation access in the room.
- Ethernet: less Wifi pollution; faster connection.
- Processor: capable of handling all this, and more.
A Raspberry Pi 3B also happens to be about the minimum device necessary to run Kubernetes.
I used Kubernetes at work for years. I came to appreciate how easy it was to manage a large fleet of hardware. It inherently provides many of the benefits of IOT mesh solutions. Discovery, load balancing, observability, and other such tasks become easy.

Allow me to explain…
Home Automation with Raspberry Pi on Kubernetes
It only recently became possible to really run a fleet of Raspberry Pis on Kubernetes. Once you have a Kubernetes Raspberry Pi cluster running, here are some write-ups on running essential software in a Raspberry Pi cluster:
Where Arduino Fits
Arduino Nano and Uno devices are on the left in the following diagram. They are essentially USB peripheral devices attached to the Raspberry Pi, as described in the Raspberry Pi temperature sensor with Arduino.
Click to enlarge:

Notice that there is still room for ESP devices, where appropriate — shown in the top left. Because they cannot run Kubernetes, they must report to a Raspberry Pi through other mechanisms.
My preferred approach is a “pull” mechanism similar to Prometheus. The ESPs (or other wifi devices) run a HTTP server that Node RED can query and then pipe to Home Assistant (see below). The advantage to this (as opposed to one where the ESPs contact the server) is greater isolation and division of responsibilities. The ESP doesn’t need to know whom to report to, nor how often to do so. If the device malfunctions, there’s not just a mysterious blank spot in the data. Instead, the agent which collects the metrics has the opportunity to report rich error details. For example, the Node RED client making requests of the ESP can note the specific error (DNS, timeout, etc.) encountered when retrieving metrics.
Why Not MySensors (or similar)?
MySensors is an Arduino library that handles much of mesh networking. In practice, I found it much easier to iterate on Node RED and similar interfaces. The architecture requires “gateway” software, which I found to be more complicated than simply integrating into my existing network (i.e., Kubernetes, Home Assistant, Node Red).
I also take some small comfort in the fact that the Kubernetes cluster is isolated and virtual. The subnet is secured from the outside world — even people on the Wifi network.
Node RED to Home Assistant & Grafana
Node RED is an extremely flexible piece of software, and fast to develop with. It comes out-of-the-box with MQTT, HTTP, and other common interfaces. There’s a great community add-on that provides first-class support for Home Assistant.

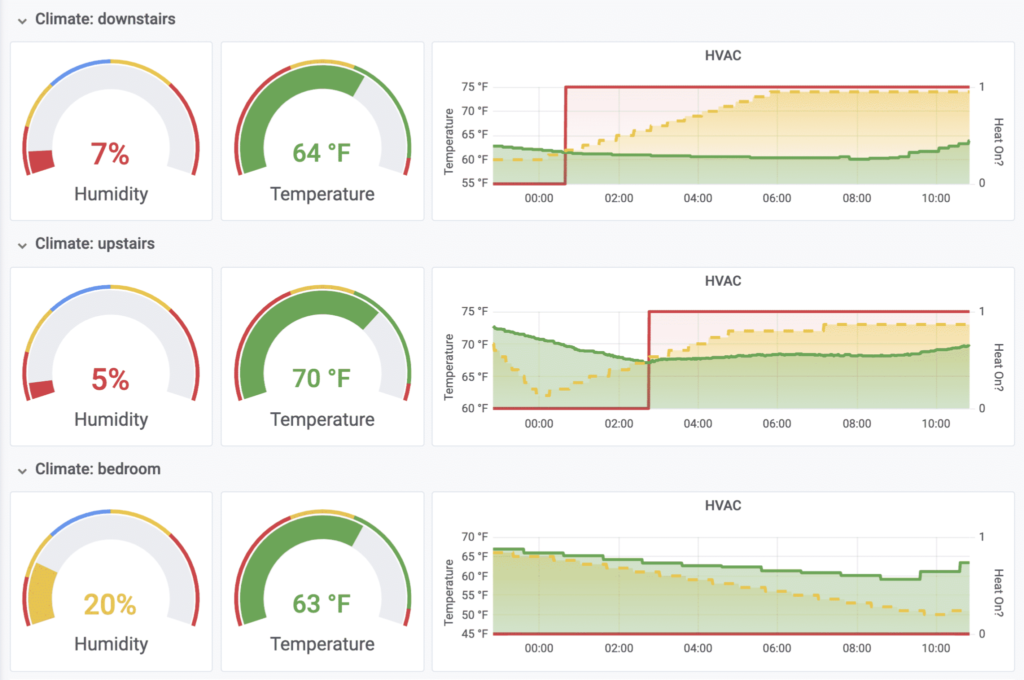
In practice, this means any data Node RED can access can be piped into a Home Assistant entity. Because Home Assistant has built-in Prometheus exporting, it’s then easy to graph this data in Grafana:

In the end, using Kubernetes for Home Assistant may have a bit of a learning curve for those who have not done so before. But as prices fall, and Raspberry Pis become even more affordable, I think it makes sense to use for IOT.
The last benefit I’ve yet to mention is the ability to tear-down and re-build the entire cluster in practically no time. Since all of the deployments are contained in yaml files, I can literally swap out one machine for another in under thirty minutes. The isolation that containers provide means that, as long as I don’t lose any persistent data, it’s absolutely trivial to make changes.
In short, Kubernetes was slower to start, but now is much faster to develop with.


What are you doing for storage on your Raspberry Pi/K8 cluster?
I run my DIY NAS. I then use the `nfs-kubernetes` storage provider such that it acts in the same way that, say, EC2 would mount an EBS — so all the nodes in the cluster use it for persistence.