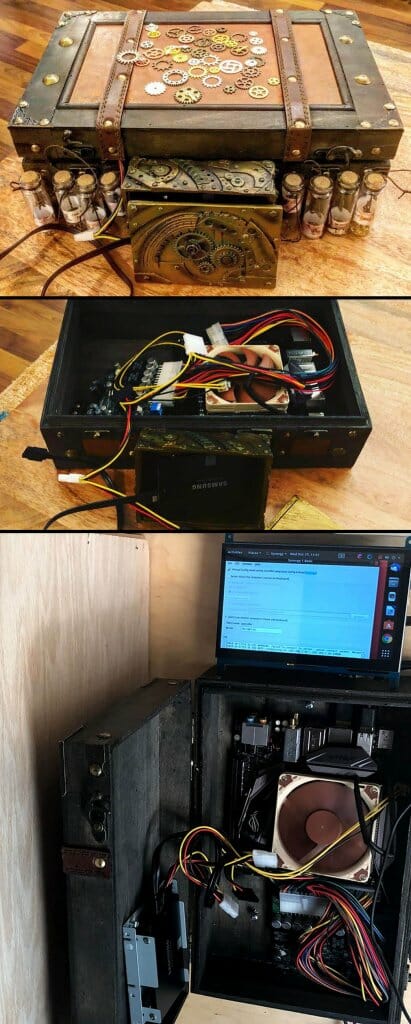
Running a dedicated computer at home to act as a server is much easier — not to mention more useful — than it used to be. It can speed up the internet while providing a great deal of privacy + security in a home build server.
After I had finished setting up the network, a server was the second task involved in retrofitting a log cabin into a smart home. On my server, I run home-assistant, pi-hole, Kodi, and my Unity build server. I use Kubernetes/Docker to deploy it all on one Ubuntu master machine with several Raspberry Pi. I’ll break down what that means and how it works below.
Designing the Server
One notable challenge with Kubernetes is that the master node needs to be highly available. If the master node is down, nothing else really functions. Incidentally, that’s why I design all of my critical DIY IOT devices, using Arduino, to work entirely without a network connection.
A Uninterruptible Power Supply (UPS) is essential for the server. Basically a giant battery, it’ll keep the machine running during power outages. My low-power steampunk computer design uses only ~50W when running as a server, meaning that even an affordable UPS can keep it online for over 10 hours.

In case the power does go out for more than 10 hours, it’s good to make sure that it turns on again automatically when the power comes back. Once everything else is set up, it’s also good to test that everything comes back to life when the computer restarts randomly (i.e., pull out the plug and plug it back in).
DIY OpenDNS Servers
Our cabin’s server can be reached at house.snowy-cabin.com. This is actually quite easy to achieve…
In order to connect to the server from outside the local network, the router has to be configured to forward ports to the server (so traffic on those ports can access the server). This, in turn, requires a static IP address for the server (so that the router knows where to find the server). You’ll need to consult your router’s documentation; many will allow you to assign a static IP address at the router level, in the same place as the port forwarding.
Once that’s all configured, the following command is useful to get the public IP address:
dig +short myip.opendns.com @resolver1.opendns.comYou can simply curl the returned IP address to see if it responds in the same way that the local IP address does. If so, then you can set up a (sub)domain to point at the IP address. There are free services out there like DuckDNS, which use a cron job to periodically ensure that the domain name points to the home server.
For a fully custom domain name, rather than something ending in duckdns.org, it’s pretty simply to achieve the same results. For example, I use AWS (Route53) and have a cron job that runs every minute. First, it checks if the IP has changed by running the above dig command and comparing it against the last time it ran. If the value has changed, it proceeds to use the change-resource-record-sets command from the AWS CLI.
Use this sample Python script to automatically update Route53 with your current IP address.
The script provides a decent starting place, though you may wish to customize it. The usage is simple: ./update-route53.py subdomain1 subdomain2 my-domain.com. It automatically determines the Zone IDs and other necessary information to update the DNS records. My crontab simply runs this every minute:
* * * * * ( ~/update-route53.py > ~/route53.txt 2>&1 )IOT, Media, and Build Server
As with the van, I deploy to all the servers in the cabin using Tiny Cluster to manage Kuberenetes for me. To handle the edge case where the internet is out and the computer restarts, it is a good idea to set imagePullPolicy to IfNotPresent. This means that containers will not automatically receive updates, which is also useful because it allows safe use of the latest tag on Docker without fear of accidentally grabbing a breaking change.
There are various guides on containerizing features like Pi-Hole docker, a Unity3D build server, etc.
Security & SSH Access
It’s important not to open more ports than necessary. I allow only ports 22, 80, and 443. The latter are the HTTP & HTTPS ports, which are handled by Switchboard to provide secure SSL/TLS.
Port 22 is used for SSH access. It’s generally a good practice to disable password login to SSH, so that only a private key may be used to access the server. This means that attackers cannot attempt to guess your password.


